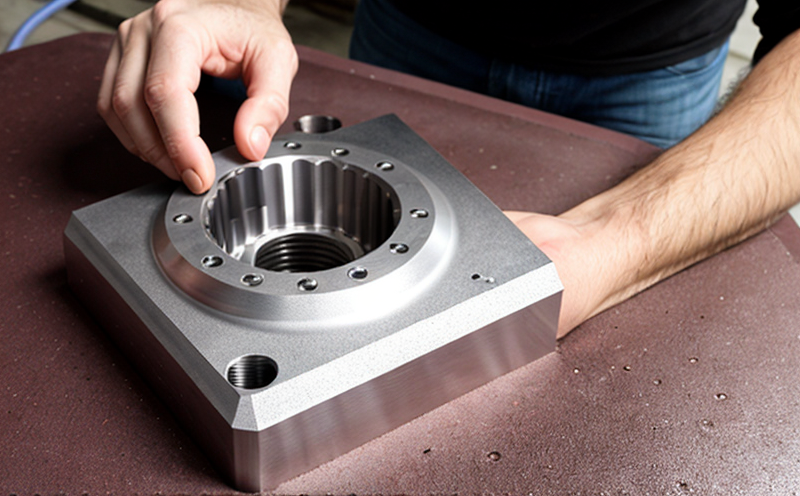
Surface finish inspection
In the realm of third-party surveillance and product quality inspection, surface finish plays a crucial role in ensuring that products meet both functional and aesthetic requirements. Surface finish refers to the texture or appearance of a material’s surface as perceived by touch or sight, and it can significantly impact the performance, durability, and marketability of manufactured goods.
The importance of surface finish cannot be overstated, especially in sectors like automotive, aerospace, electronics, and medical devices, where even minor imperfections can lead to functional failures. For instance, in the automotive industry, poor surface finish on engine components could lead to increased wear and tear, reducing the lifespan of the vehicle. In consumer electronics, a subpar finish can lead to rapid corrosion or degradation.
Surface finish is typically measured by roughness parameters such as Ra, Rz, and Rt. These parameters are defined in international standards like ISO 4287 and ISO 1302, which provide a framework for quantifying the surface texture. The choice of parameter depends on the specific application; for example, Ra is used to describe the arithmetic mean roughness, while Rz represents the average peak-to-valley height.
The inspection process involves several key steps: sample preparation, measurement, and evaluation. Samples are typically prepared by cleaning them with appropriate solvents or abrasives to remove any contaminants that could affect the accuracy of the measurements. Once cleaned, the samples are examined using specialized equipment such as profilometers or stylus instruments.
The testing apparatus used in surface finish inspection includes advanced optical profilers and stylus instruments capable of providing high-resolution images and data points. These instruments can measure surface roughness over a wide range of scales, from micro to nano meters. The results are then analyzed using statistical methods to ensure that they fall within the acceptable limits specified by the relevant standards.
The acceptance criteria for surface finish inspection vary depending on the industry and product type. For example, in the medical device sector, surfaces must be smooth enough to avoid causing irritation or contamination. In contrast, in the aerospace industry, a rougher surface may be desirable to enhance adhesion between components. Understanding these nuances is critical for ensuring that products meet both regulatory requirements and customer expectations.
Surface finish inspection is not just about meeting standards; it’s also about enhancing product performance and reliability. For instance, in the automotive sector, improving surface finish on brake pads can lead to better heat dissipation, reducing the risk of overheating during high-speed driving. In the electronics industry, a smoother surface on printed circuit boards can reduce the likelihood of shorts or other electrical faults.
In conclusion, surface finish inspection is an essential aspect of product quality assurance, offering tangible benefits in terms of performance, durability, and customer satisfaction. By adhering to international standards and using advanced testing equipment, laboratories can provide reliable and accurate results that are critical for maintaining high-quality products across various industries.
Applied Standards
The following international standards are commonly applied in surface finish inspection:
- ISO 4287: Geometrical product specification (GPS) — Surface texture: terminology, parameters and deviations
- ISO 1302: Geometrical product specification (GPS) — Surface texture: determination of the roughness parameters Ra, Rz and Rt
- ASTM E478-95(2020): Standard Practice for Sampling and Testing Painted or Coated Metal Products
- EN 1633: Surface texture — Geometrical parameters of surface roughness, waviness and lay
These standards provide a framework for measuring and interpreting surface finish characteristics, ensuring consistency across different laboratories and industries.
Scope and Methodology
| Parameter | Description |
|---|---|
| Sample Preparation | Cleaning, drying, and conditioning the sample to ensure accurate measurements. |
| Measurement Equipment | Use of profilometers or stylus instruments capable of high-resolution imaging. |
| Data Collection | Collection of roughness parameters such as Ra, Rz, and Rt. |
| Data Analysis | Analysis using statistical methods to determine compliance with acceptance criteria. |
| Reporting | Preparation of detailed reports outlining the inspection results and recommendations for improvement. |
The methodology employed in surface finish inspection involves a rigorous process from sample preparation to final reporting. The first step is meticulous cleaning and conditioning of the samples, which ensures that any external factors do not interfere with the measurement accuracy. Once prepared, the samples are examined using advanced profilometers or stylus instruments capable of providing high-resolution images. These instruments measure surface roughness over a wide range of scales, from micro to nano meters.
The collected data is then analyzed using statistical methods to determine whether it falls within the acceptable limits specified by international standards such as ISO 4287 and ASTM E478-95(2020). This analysis ensures that the surface finish meets both functional and aesthetic requirements. Finally, detailed reports are prepared, outlining the inspection results and any recommendations for improvement.
Competitive Advantage and Market Impact
- Accurate measurement of surface roughness parameters using advanced equipment.
- Compliance with international standards, ensuring consistency across different laboratories and industries.
- Timely delivery of comprehensive reports that provide actionable insights for product improvement.
- Expertise in interpreting complex data to identify areas for optimization.
- Ability to offer customized testing solutions tailored to specific industry needs.
The competitive advantage of our surface finish inspection service lies in its ability to deliver accurate, consistent, and timely results. By adhering strictly to international standards and using advanced equipment, we ensure that every sample is inspected with precision and care. This not only enhances product quality but also helps companies stay ahead of their competitors by identifying areas for improvement early on.
The market impact of our service extends beyond individual clients; it contributes to the overall quality and reliability of products across various industries. By setting a high standard for surface finish inspection, we help ensure that consumers receive products that are not only functional but also meet the highest aesthetic expectations. This, in turn, fosters customer satisfaction and loyalty, driving market growth and innovation.


