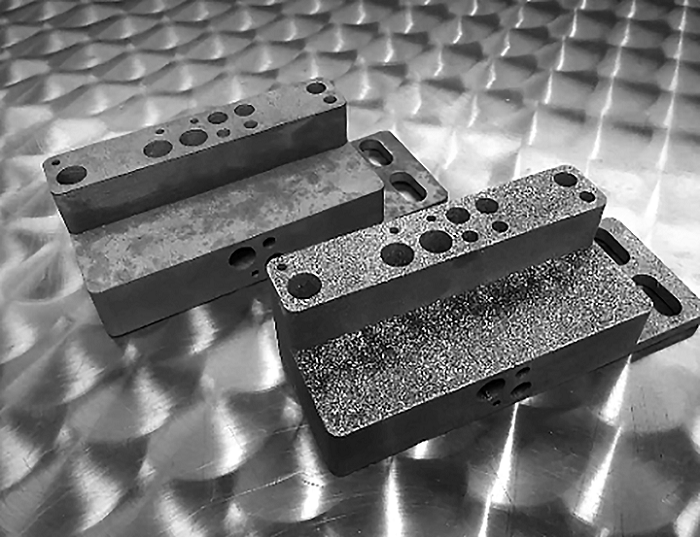
ISO 4287 Surface Roughness Measurement after Post-Processing
The ISO 4287 standard provides a comprehensive framework for measuring surface roughness, which is critical in the additive manufacturing and 3D printing sectors. This test ensures that post-processing treatments do not compromise the integrity of the final product’s surface quality. Surface roughness can significantly impact performance characteristics such as wear resistance, corrosion resistance, adhesion properties, and overall aesthetics.
Post-processing includes a range of techniques aimed at enhancing the mechanical or aesthetic qualities of manufactured parts. These processes may involve heat treatment, coating applications, polishing, or annealing. The goal is to achieve optimal surface roughness that aligns with design specifications while maintaining the structural integrity of the part. Proper measurement and control of surface roughness are essential for ensuring product quality consistency across production runs.
The testing process typically involves selecting an appropriate stylus tip radius based on the sample geometry and surface finish. The stylus scans along the surface, recording height deviations from a reference plane. Data collected is then analyzed according to ISO 4287:1997, which defines several parameters like Ra (Arithmetic Mean Deviation), Rz (Average Maximum Height of Irregularities), and Ry (Maximum Peak-to-Valley Height).
For accurate measurements, it's crucial to prepare the sample correctly. This includes cleaning the surface from contaminants such as oils or dust before testing. It’s also important to ensure that temperature fluctuations do not influence results since they can affect material properties. Once prepared, samples are placed on a mounting fixture suitable for the chosen measuring instrument.
Post-processing affects surface roughness in various ways depending on the specific process used. For instance, laser treatments tend to reduce surface roughness by smoothing out irregularities, whereas mechanical polishing might increase it slightly due to material removal processes. Understanding these effects helps manufacturers make informed decisions about which post-treatment methods are best suited for their applications.
When specifying ISO 4287 tests during the product development phase or quality assurance process, factors such as intended use and regulatory requirements should be considered. Compliance with relevant standards like ISO 1302, which covers surface finish evaluation methods, ensures that all stakeholders have confidence in the reliability of test results.
At Eurolab, our experienced team uses state-of-the-art equipment to perform these critical measurements accurately. Our laboratories are equipped with advanced instruments capable of capturing detailed profiles over large areas if needed. Reporting follows internationally accepted guidelines ensuring clear communication between parties involved in any supply chain or project involving additive manufacturing and 3D printing.
Understanding the intricacies of surface roughness measurement is key to achieving high-quality products through effective post-processing treatments. By adhering strictly to international standards like ISO 4287, manufacturers can ensure consistent performance across their entire production cycle.
- Enhanced Durability: Properly treated surfaces resist wear and tear better.
- Better Adhesion: Improved bonding between layers or materials enhances overall structural integrity.
- Aesthetic Appeal: Smooth finishes contribute to visually appealing products.
- Increased Efficiency: Optimized surface characteristics lead to more efficient manufacturing processes.
In summary, ISO 4287 testing after post-processing plays an indispensable role in ensuring that additive manufactured components meet both functional and aesthetic expectations. At Eurolab, we pride ourselves on delivering accurate, reliable data backed by decades of experience within the industry.
Eurolab Advantages
At Eurolab, our commitment to excellence in surface roughness measurement after post-processing is reflected in several key advantages:
- Experienced Professionals: Our team comprises highly skilled technicians who understand the nuances of additive manufacturing and 3D printing processes.
- State-of-the-Art Equipment: Leveraging cutting-edge technology ensures precise measurements every time, providing confidence in our results.
- Comprehensive Reporting: Clear documentation supports decision-making throughout the supply chain or product lifecycle.
- Regulatory Compliance: Ensuring all tests meet relevant international standards like ISO 4287 guarantees compliance with global regulations.
- Dedicated Customer Support: Our dedicated team is available to assist clients from initial consultation through final report delivery.
- Custom Solutions: Tailoring our services to meet individual client needs ensures every project receives the attention it deserves.
- Fast Turnaround Times: Efficient handling of samples minimizes delays without compromising on quality standards.
By leveraging these advantages, Eurolab helps ensure that your additive manufacturing and 3D printing projects consistently meet or exceed expectations.
Customer Impact and Satisfaction
- Increased Product Quality: Accurate surface roughness measurement leads to higher quality products, enhancing customer satisfaction.
- Enhanced Efficiency: By identifying potential issues early in the process, you can avoid costly rework or scrap, improving overall efficiency.
- Better Decision Making: Precise data enables better-informed decisions regarding material selection and manufacturing processes.
- Improved Reputation: Consistently high-quality products build trust with customers and partners alike.
- Lower Risk of Failures: Ensuring surface roughness meets specifications reduces the likelihood of premature failure, protecting both reputation and investments.
In summary, our comprehensive approach to ISO 4287 testing not only enhances product quality but also contributes significantly to business success by fostering long-term relationships with satisfied customers.
International Acceptance and Recognition
The International Organization for Standardization (ISO) has developed numerous standards related to surface roughness measurement, including ISO 4287:1997. These standards have gained widespread acceptance across industries worldwide due to their rigorous scientific foundation and applicability.
Many countries adopt these standards as national standards or recommend them for use in various sectors. For instance, the European Committee for Standardization (CEN) often aligns its own standards with those of ISO when appropriate. Similarly, organizations such as ASTM International also reference ISO guidelines within their own documents where relevant.
Adopting internationally recognized standards like ISO 4287 not only simplifies international trade but also promotes consistency in quality assurance practices globally. This uniformity benefits suppliers and buyers alike by creating a shared understanding of expectations regarding surface roughness measurement.
In conclusion, adherence to these established norms helps establish credibility both locally and abroad, making it easier for businesses to engage with global markets confidently.


